Introduction
Creating your own mods can make your Final Fantasy XIV experience far more personal and creative. If you’ve ever wanted to customize characters, outfits, or visual elements, learning how to build your first Penumbra mod is the perfect place to start. Penumbra provides a flexible mod management system that allows players to add and control custom content safely without directly modifying the game files.
This beginner’s guide walks you through building your first Penumbra mod step by step, explaining the basic structure, required files, and setup process. By the end, you’ll understand how to create a simple mod and load it through Penumbra, opening the door to more advanced customization in Final Fantasy XIV.
By using Penumbra FFXIV as your development home, you gain real-time feedback that makes learning the ropes fast and fun. Whether you want to change an armor color or add a cool tattoo, we have the roadmap to help you succeed!
What are the essential tools for building your first mod?
Before you start painting, gather a few digital tools that will serve as your hammers and brushes. You will need a good image editor that supports layers and a specific plugin to save files in the game’s preferred texture format.
Setting up your workshop correctly from day one prevents the frustration of files not loading or colors appearing wrong. Think of this as preparing your canvas; the better the start, the smoother your creative work will be.
Setting Up a Dedicated Workspace and Mod Root Directory
Create a special folder on your desktop labeled “My Work” to keep your project files separate from the game data. This workspace ensures that if you make a mistake, you won’t lose your original art or mess up your game.
Installing Necessary External Image Editors and Texture Plugins
Download a high-quality photo editor like GIMP to handle the heavy lifting of your visual design work. You must also install a “DDS” converter so the game engine can actually read the beautiful art you are about to create.
Step-by-Step Points for Creating a Basic Texture Swap
A texture swap is the easiest way to start because it uses existing shapes but lets you change colors and patterns. It is the perfect project for a beginner to understand how the redirection engine finds and replaces standard game files.
Step-by-Step Points for Creating a Basic Texture Swap
- Find the specific item ID you want to change using an online game database.
- Use the export feature in your plugin to grab the original texture as a reference.
- Open that texture in your image editor and change the colors to your liking.
- Save your new art as a “.dds” file with the exact same name as the original.
- Place your new file into your workspace folder following the correct internal path.
- Hit the reload button in your plugin to see your new colors appear on your character.
Defining Your Mod Identity: Naming and Metadata Configuration
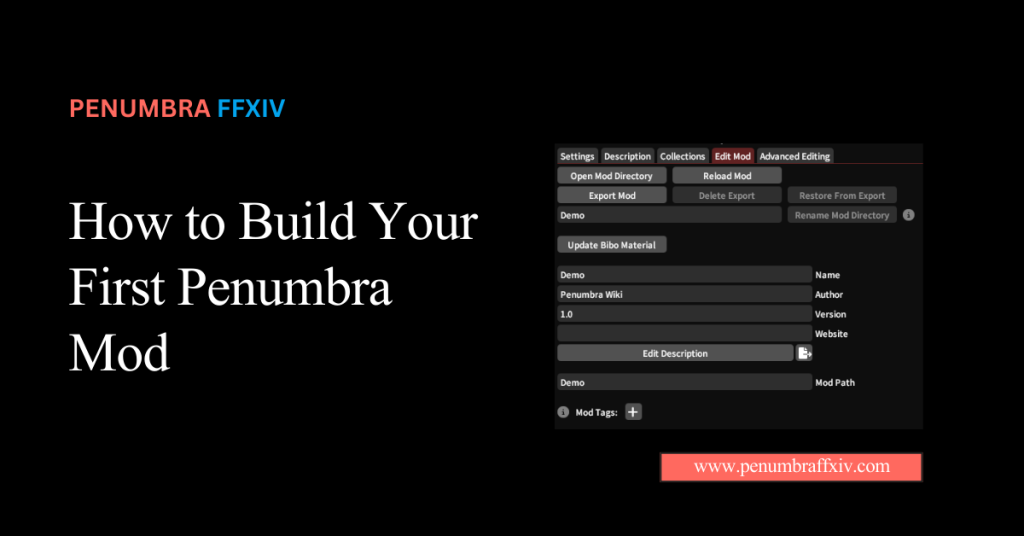
Every great mod needs a clear name and a short description so the system can categorize it. Adding metadata is like putting a label on a box; it helps the plugin’s brain understand what your mod is supposed to do.
This step is also important if you ever decide to share your work with the community later on. Taking the time to fill out these details makes your mod feel professional and keeps your internal library from becoming a mess.
Organizing Your Internal Folder Structure for Clean Deployment
The game looks for files in a very specific order: “chara/equipment,” then the item ID. You must copy this exact folder structure inside your mod folder, or the engine will never be able to find your art.
Writing Descriptions and Version Notes for Your Custom Project
Use the mod info tab to write a short note about what your mod changes, like “Blue Armor Recolors.” Keeping track of your version numbers helps you stay organized if you decide to tweak the colors or fix bugs later.
Comparison Table: Choosing Between Simple Swaps and Complex Overhauls
| Color Swap | Beginner | Changing Armor Colors | 30 Minutes |
| Texture Overhaul | Intermediate | Adding Skin Details | 2-4 Hours |
| 3D Mesh Edit | Advanced | Changing Gear Shapes | 10+ Hours |
Technical Validation: Testing Your Creation in a Live Environment
Once your files are in place, it is time to perform a live test to ensure the textures don’t flicker. Lighting in the game is very different from your image editor, so you should test your mod in both bright and dark areas.
If something looks off, you don’t need to close the game; just edit your art and hit redraw. This fast loop is the best way to learn how different colors and materials respond to the game’s lighting engine in real time.
Checklist for Successful Mod Export and Character Redrawing
- Ensure the enable box is checked for your new mod in the list.
- Confirm that your character name is linked to the collection containing the mod.
- Check that no other mods with a higher priority are overriding your new textures.
- Use the redraw command in the chat or menu to force a fresh render of your model.
How to Use the Debug Console to Fix Immediate Loading Errors
The debug console shows you exactly what the game is thinking as it loads your custom files. If a file path is incorrect, the console highlights it in red, making it easy for you to find and fix.
It is a powerful tool for beginners because it takes the guesswork out of troubleshooting. Watching the console as you load your mod can help you understand exactly how the redirection process works from the inside.
Finalizing Your Project: Packing and Sharing Your New Asset
When you are happy with your creation, you can pack it into a single file that is easy to move or send. Packing your mod compresses the data and ensures all the folder paths stay exactly where they need to be for others.
Sharing your first mod is a huge milestone and a great way to get feedback from other creators. Whether you keep it for yourself or upload it, seeing your own work in a cutscene is a feeling you will never forget!
Comparison Table: File Sizes vs. Quality for Beginner Texture Mods
| 1024×1024 | Small | Standard Game Feel | Very Low |
| 2048×2048 | Medium | Sharp and Clear | Moderate |
| 4096×4096 | Large | Ultra High Detail | High |
Conclusion
Building your first mod is an incredible way to deepen your connection to the game and express your unique vision. By following this beginner guide, you have learned the core skills of asset redirection and folder organization that form the basis of all custom content.
Remember that every master artist started with a simple color change, so don’t be afraid to experiment and make mistakes. The community is full of helpful creators, and the more you practice, the faster you will turn your wildest ideas into reality.
You have already taken the hardest step by starting your very first project, and now Eorzea is truly your canvas. Keep your folders organized, stay curious about lighting, and most importantly, have fun creating the perfect look for your hero!
Frequently Asked Questions (FAQ)
Do I need to know how to code to make a mod?
Not at all! Most visual mods are just about moving files into the right folders and editing images in a program like GIMP or Photoshop.
Where can I find the original game textures to edit?
You can use the built-in export tool in the plugin menu to find any item in the game and save its texture to your computer.
What is the most important part of making a mod?
The folder path is the most critical part. If your custom texture isn’t in the exact sub-folder the game expects, it will never show up on your character.
Why does my mod look gray or colorless in the game?
This usually means the texture was saved in the wrong format. Make sure you use a TEX or DDS format that the game’s engine understands.
Can I break my game if I make a mistake?
No, because the redirection tool doesn’t touch your actual game files. If you make a mistake, you can simply delete your mod folder, and the game will return to normal
How do I change the color of just one part of an outfit?
You will need to use layers in your image editor. This allows you to paint over the specific area you want to change while keeping the rest the same.
Can other players see the mods I create?
No, other players will only see the standard game gear. To show them your work, you would need to send them your mod file so they can install it.
Is it okay to use 4K textures for my first mod?
While you can, it is better to start with standard sizes, such as 2048×2048. This ensures your mod runs smoothly and doesn’t cause lag while you test it.
Latest Posts: